Blister Prevention - 6 Tips for Happy Feet


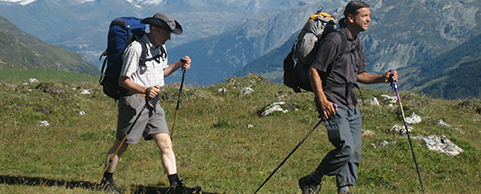
Hiking blisters are a constant source of frustration for bushwalkers everywhere. The whole enjoyment level and success of your hike can start and end with your feet.
There is a multitude of factors that can cause blisters: excessive friction, excessive moisture, heel slip, heel pressure, worn-out boot lining and so on. The key nemeses of blister-free feet are friction and, its evil cousin, moisture. When these two get together, they'll want to party in your boots. Then you'll start to feel that tingling feeling that signals the onset of those dreaded "hotspots".
When it comes to blister prevention, there is no magic bullet. Hiking footcare is a multi-faceted exercise that requires a little bit of experimentation and perseverance on your part. What it comes down to is employing a few tactics to ensure you are stacking the odds in your favour.
In order to combat blisters, you can be proactive or reactive. Being proactive involves making choices to protect your feet before you start walking. Being reactive involves remedying a blister or hot spot in its early stages. To give yourself the best chances and have an enjoyable trip, be ready for both situations. Below we’ve detailed some different strategies for both mitigating and remedying blisters.


1. Preventative Taping of Blisters
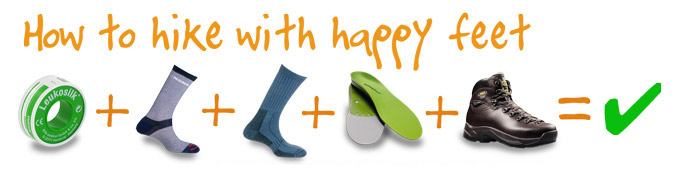
I am a fan of taping feet as a pre-emptive strike against blisters. I favour adhesive sports tapes such as Leukoplast. Leukoplast waterproof (blue container) is best for problem feet but the recently released Leukosilk (green container) is finer and is excellent also and less harsh.
Normally I will just tape my heels as this is my problem area if I am going to have a problem, but you can tape your arches or even your individual toes if you wish. You can find preventative taping suggestions on the internet. Make sure the tape goes on nice and smooth and flat with no risen edges that could create abrasion points.
2. Liner Socks
A liner sock is a very thin sock usually made from silk or synthetic materials such as Coolmax (for summer walking) or Thermolite (for winter walking). The liner sock goes on your foot first, directly against your skin and then your hiking sock goes over the top. The moisture wicking properties of the liner sock move moisture away from your foot and out through the liner into your outer sock. Thus, a dryer skin surface which is less susceptible to abrasion.
The central theory however is that creating a sock to sock interface, absorbs the sliding and shearing motion that is most likely to shear and tear your skin's layers. There has been some actual scientific study done in this area back in the 1990s using US marine recruits as guinea pigs! Basically three groups were tested comparing various sock/boot combinations. The result – a high quality dense sock over a thin polyester liner reduced the overall incidence of blisters as well as the incidence of severe blisters.
NB: Stay away from cotton as cotton absorbs moisture and takes ages to dry – not good. A variation on the liner sock is the toe sock as seen in the Injinji brand. The toe sock is a liner sock also and will benefit those hikers who find they suffer from abrasion and blisters between their toes.
3. Quality Hiking Socks
So your liner sock is on, now for your hiking sock. A good quality hiking sock such as a Bridgedale or a Mund is in a completely different league to your stock standard "work" sock or the even more ubiquitous "thick" sock. A purpose-designed hiking sock employs purpose-designed technology – such as wicking, zonal padding, zonal lycra and elastics to ensure the sock is positioned correctly on your foot.
Because of this technology, a decent hiking sock will be a bit pricey. But they feel fantastic, supportive and comfy on your foot – just well worth it! And, unlike generic socks that can collapse and thin out over time, quality hiking socks retain their inbuilt structure for longer – so they end up being better value in the long term.
There are lightweight, mid-weight, heavy-weight and expedition-rated socks available to suit your adventure. When you are buying your new boots I would suggest you buy some hiking socks at the same time. Pop them on in-store for your boot fitting.


5. Superfeet
Superfeet are a range of "off the shelf" orthotics – based on the principles of podiatric medicine. Many standard insoles found in boots and walking shoes, trail runners and even ski boots can be fairly flimsy, unstructured and two-dimensional – you'll see that you can easily bend them, twist them and fold them in half! However, your foot is three-3 dimensional and so this is where Superfeet come in.
Superfeet have a distinct shape, deep structured heel cup and full length foam structure which all assist in lifting, aligning and stabilising your foot in a more biomechanically sound position. Superfeet claim their insoles support and stabilise the rear of the foot, promoting a better heel strike. This in turn lessens fatigue and stress in the foot and the lower limbs.


Some people are accustomed to buying Superfeet as a matter of course when buying new boots or walking shoes. In the ski boot fitting arena, replacing the factory issue 2D footbed has been customary for years.> If you are finding that your chosen boot or walking shoe is displaying some heel lift or seems to have a tad too much overall volume, then replacing the factory issue insoles with Superfeet can sometimes be just enough to absorb the extra volume and lock your foot and heel into a more desirable stable and secure position.
NB: If your existing boots are causing you problems, including blisters, then it would definitely be worth trying some Superfeet and the liner/hiking sock combo described above – before you give up and relegate your boots to the bin.
However, there is not an awful lot that can be done if your boot is simply too short for your foot – which brings us to the all-important topic of the boot fit.
5. Hiking Boot Choice and Boot Fit
It is very unlikely that your usual street shoes size will directly translate to your boot size, because often your boot size will need to be bigger. Why? Well, in a boot fit, we are looking to tick off a few boxes:
- 10–15+mm of clear space from the end of your toes to the front of the boot is desirable to ensure your feet have room to expand when you are clocking up those big Ks in hot weather. Plus you don't want those extended descents to result in you shedding toenails!
- The width and forefoot of the boot should be firm and supporting without squeezing, pinching and deforming your foot in any way; and finally,
- Your heel should be locked into the back of the boots without any excessive heel lifting.
A boot that ticks all these boxes is less likely to cause blister misery. Ensuring you get the right boot fit is really stacking the odds in your favour. Read more about getting the correct boot fit in our article on how to choose a bushwalking boot.
6. Blister Treatments
Moleskin
You will have gathered from this article that the idea is to prevent getting a blister in the first place. However... should you find you have hotspots, moleskin is the most reliable dressing for blister prevention. Products like Adventure Medical Kits have made moleskin easier than ever to apply; adding die-cut shapes to fit common problem areas, including the heel, side of foot, and toes. Equip also has an excellent blister treatment pack that also contains Leukofoam.
Apply moleskin to problem areas before you begin hiking or as soon as you feel friction on the trail, and blisters will be a thing of the past. If your blisters get to a painfully advanced stage, cutting foam donut pads and stacking them around the blister can help to alleviate the pain and get you back on your feet again. The most important thing is to apply treatment the moment you feel a hot spot. STOP, DROP & ROLL (the bandaid on) the moment you feel discomfort, no matter how inconvenient.


Acti-Bliss Wool
This lanolin-enriched wool provides a natural solution to blister prevention and management. Essentially, you can use this to take pressure off the affected area of your foot, be it a hotspot or toes. To apply it, hold it on the spot as you put your socks on. With a bit of movement, the wool binds into the sock’s threads, keeping it in the same area. Considering it takes a bit of finesse to get this in the right position, it’s probably more effective to apply the wool before you start of the day when you have the physical and mental energy to do it properly. Throughout the day, you can check on the area and re-apply if necessary. Once compressed, dissipated or no longer working, you can simply pull a new piece off and re-apply.
BodyGlide Foot Balm
Foot Glide anti-blister balm is my personal favourite method of blister prevention, because it doesn't require adding any mass to your foot. Basically, you can use BodyGlide's Foot Glide to lube up your feet before you start hiking. At a pinch, you can use a chunk of chapstick to the same effect (as I have), but Foot Glide is miles above in terms of function and longevity. When applying, there’s no need to lather it on – less is definitely more. Focus on areas between the toes and other key spots where you usually find pressure or rubbing. I’ll usually apply the balm between my toes, across the ball of my foot, around my big toe joint and behind/under my heel. Personally, I don’t get blisters often, so when I apply this in the morning it will do me for the day. Although, if I have multiple river crossings planned for the day, I might re-apply. Also, if you’re avoiding animal products, you might like to know that this balm is vegan-friendly.
Happy hiking and may you be blister free!
Questions? Visit us, email us or call us (03 9600 0599).
More Articles
- HOW TO CHOOSE BUSHWALKING BOOTS, PART 2
- LIGHTWEIGHT BUSHWALKING: HOW TO
- SLEEPING BAGS: HOW TO CHOOSE
- MORE RESOURCES...

Questions?